This is the 4th post in the Xamarin and DevOps series. The topic at hand is versioning of your mobile app. Having a standardised version number helps you track your releases and issues that might occur in them and especially when using tools like HockeyApp or Xamarin Insights it can also help you to track these issues.
Other articles in this series
Make sure to check out some of the other articles in this series!
- The build agent
- Setting up your Android CI
- Setting up your iOS CI
- Versioning your app (this post)
A little bit about versioning
Both Xamarin iOS and Android apps have a version yet there’s no definitive standard for these version numbers. That’s why I will talk about one that works for me. Out of the box these Xamarin apps have a version number in the format of 1.0.0. This scheme of using a major version, minor version and a build number is pretty common while common format adds the Git commit hash somewhere at the end of the version number.
What do I need?
To follow along with this post you need to have a few things:
- A working Visual Studio Team Services (VSTS) build as created in this post.
- A Xamarin Android or iOS app to version.
- The Version Assemblies build task available in the Visual Studio Marketplace. This is a great set of tasks that helps alleviates a lot of the pain that goes with versioning your assemblies. Install this ASAP!
At the end of this post you will have a versioning system set up for both your Xamarin Android and iOS apps in using the same format while still being able to track your releases in VSTS.
Versioning your Xamarin iOS app
In an iOS app your version number resides in the Info.plist file. The appropriate key in this XML-based file is the CFBundleVersion key. As mentioned at the beginning of this post the version number we will be creating has a major, minor and build version. Because out of the box a Xamarin iOS app only uses a major and a minor version number the first thing we need to do is change that by opening the Info.plist and setting the Build number to 1.0.0.

Next up is adding the necessary build step (Colin’s Version Assemblies as mentioned above) to the automated build you created in the previous post in this series. Open your build definition and click Edit.

Click on the Add Task button and add the Version Assemblies task that you installed.
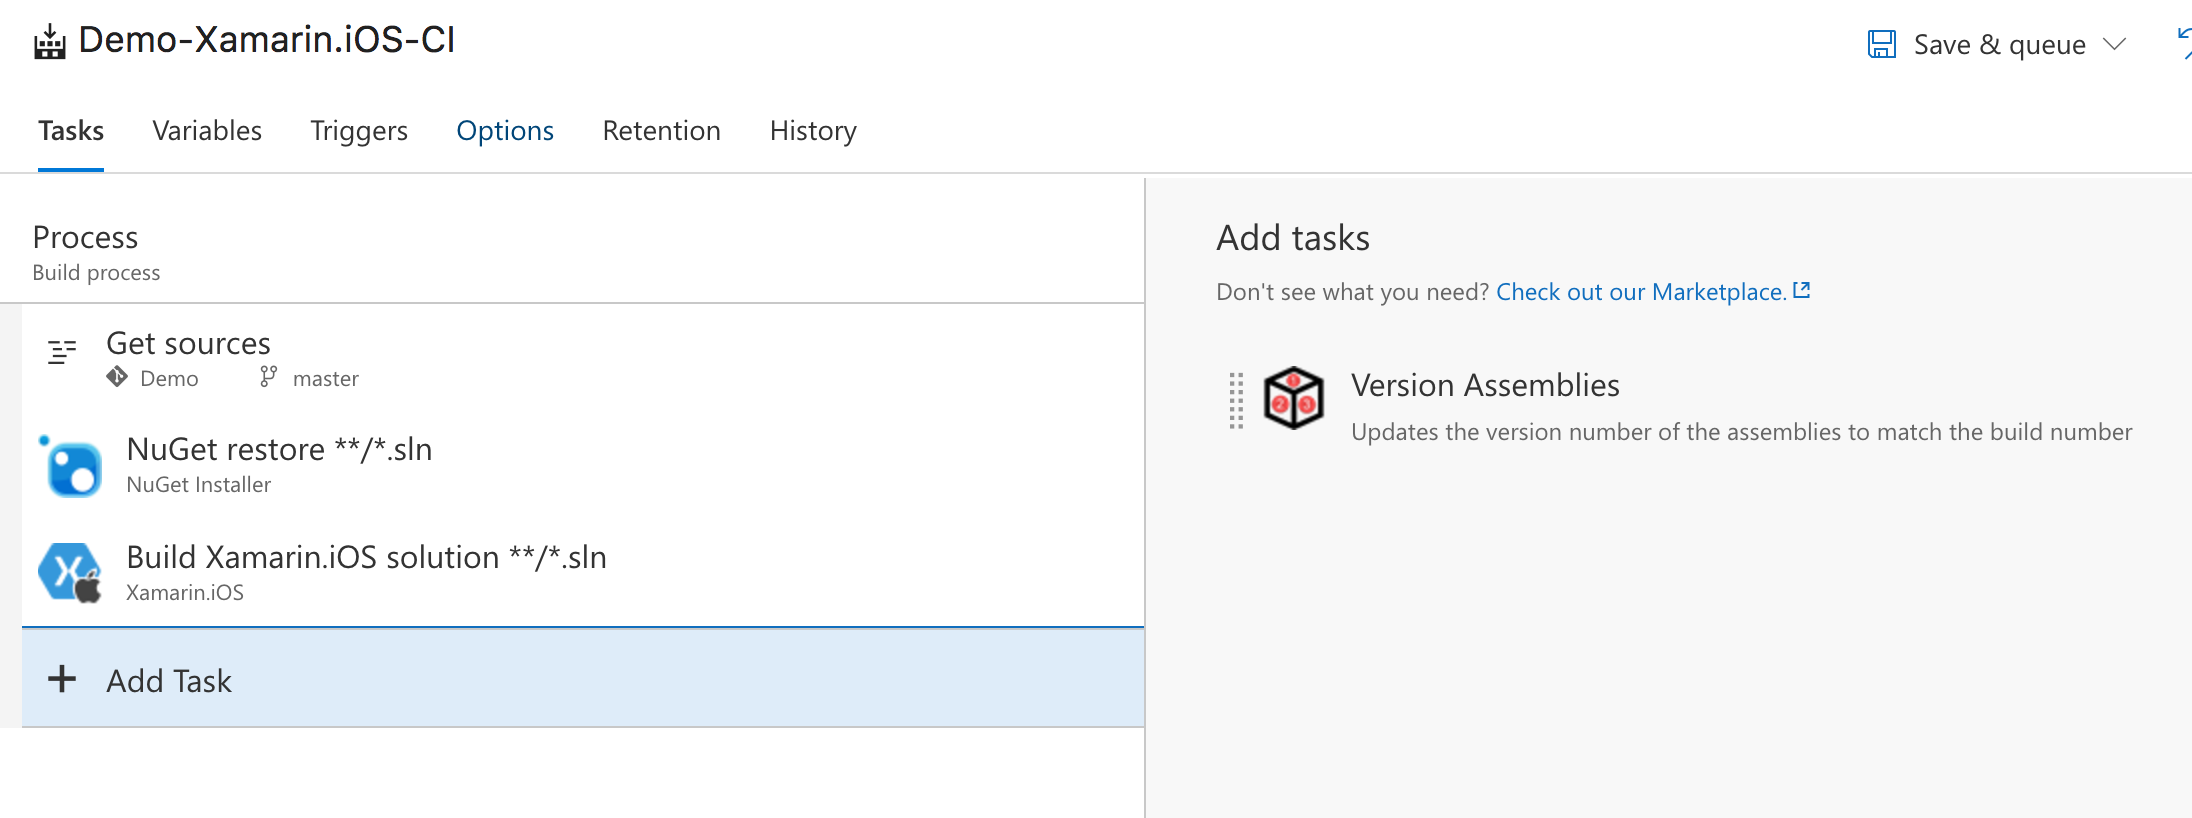
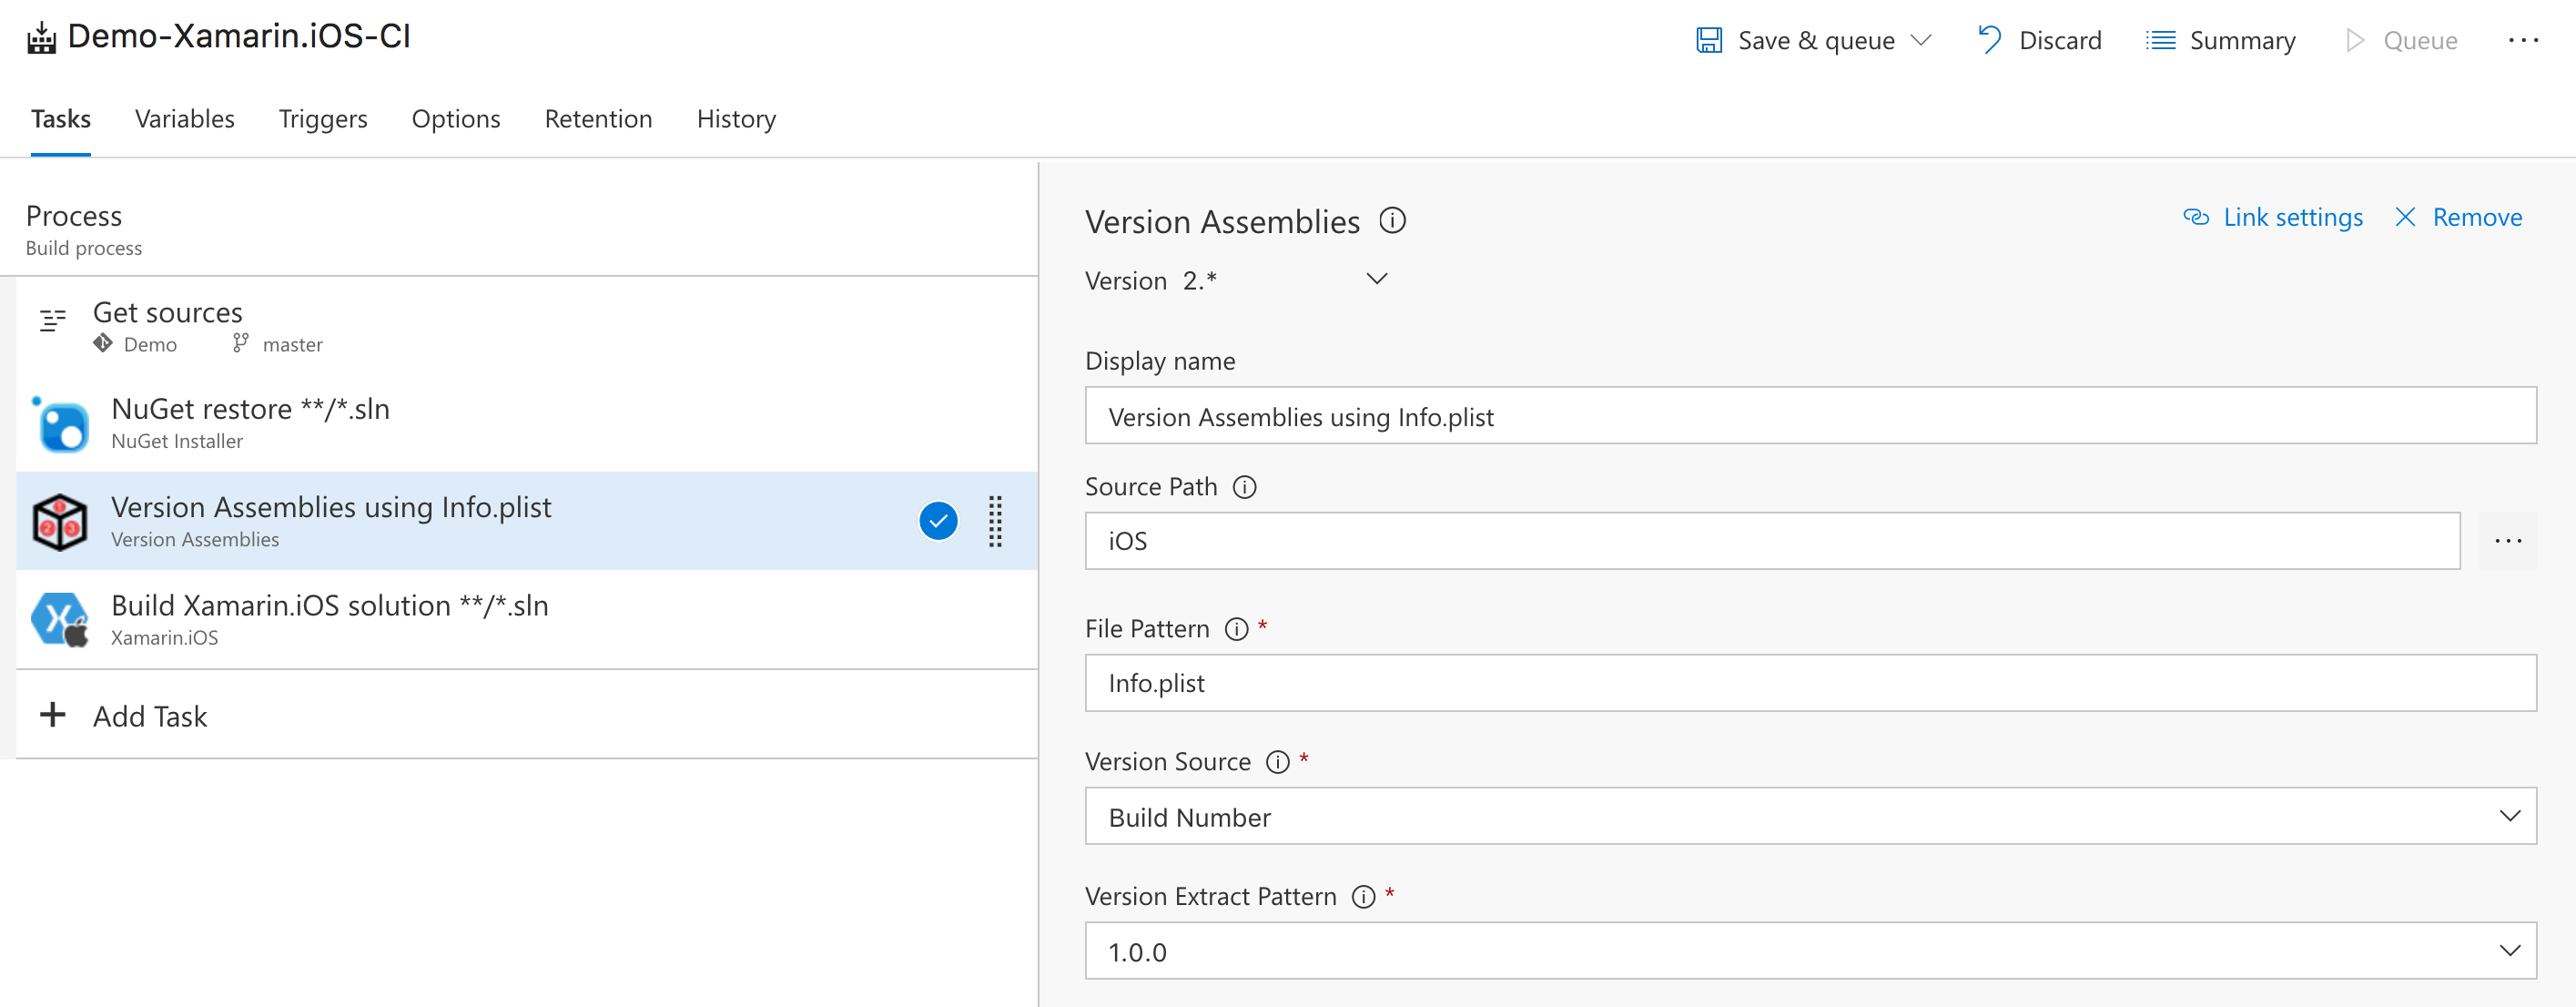
Drag it between the NuGet restore and Build Xamarin.iOS solution tasks so we set the version number just before VSTS starts the build. Then edit the Source path using the … button and pick the folder of your iOS app. Also set the File Pattern to Info.plist to ensure that the build task can find the file where our version number resides. Set the Version Source to Build Number and the Version Extract Pattern to 1.0.0. Be sure to save your work as well!
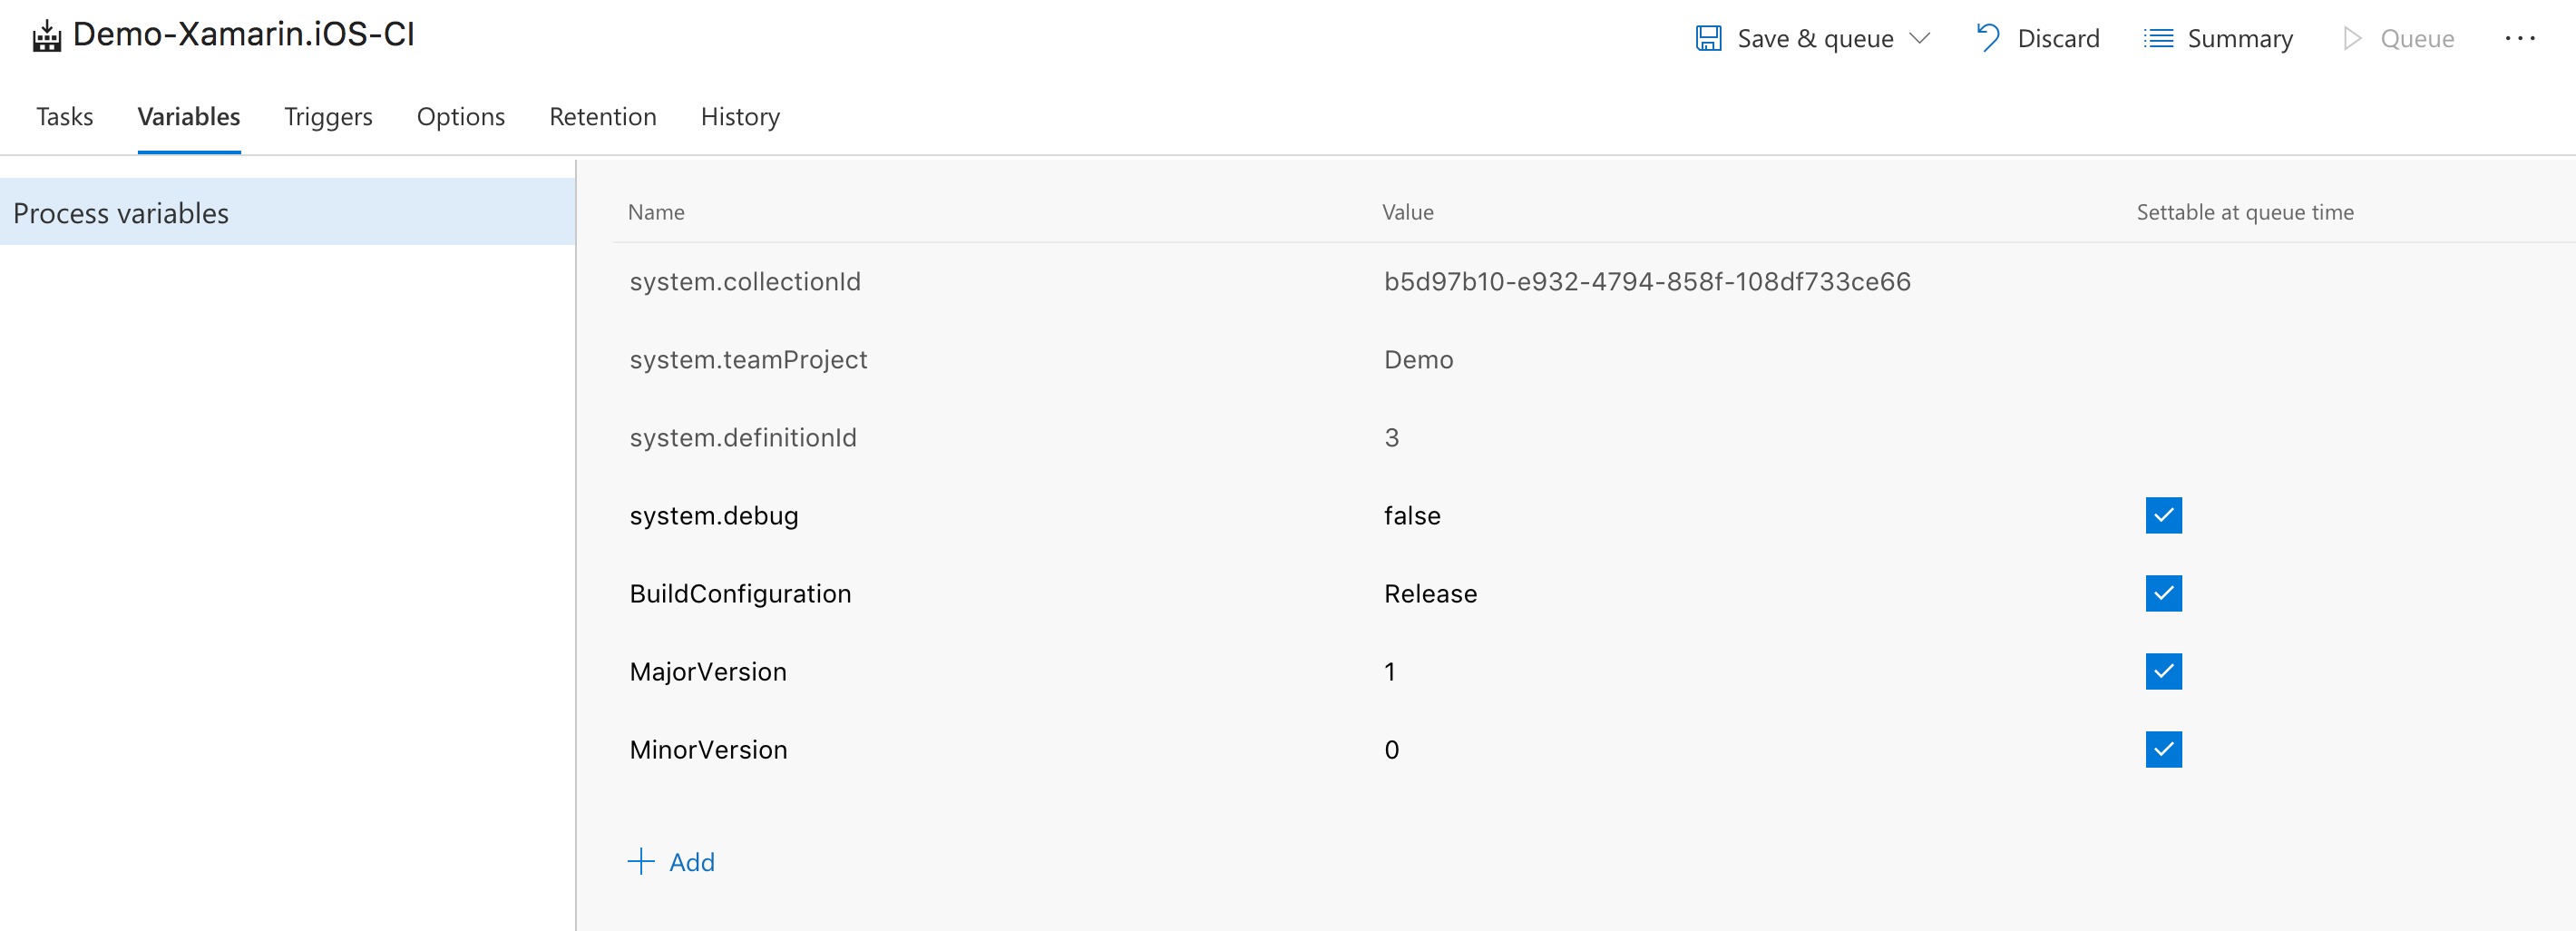
This step will now take the Build Number and inject that into the version string it can find in the Info.plist file. But the problem is that your build number looks something like this out of the box: 20170520.01. That’s not quite the format we’re looking for. The format used can be set in the Options tab in your build definition. My preferred method is to have a major and minor version I can set for myself and an automated ID appended to it as the build number. Luckily VSTS has some built-in variables we can use for that! First let’s start by creating two variables called MajorVersion and MinorVersion and set them to 1 and 0. You can make them settable at queue time if you want and I update these when necessary before a release.
Next up we change the format of the build number in the Options tab to $(MajorVersion).$(MinorVersion).$(BuildID) and once again make sure that you save your changes. The BuildID in this format string is a built-in integer that increments with each build you queue within your VSTS server so if you have multiple automated builds they all count towards this integer.
Versioning your Xamarin Android app
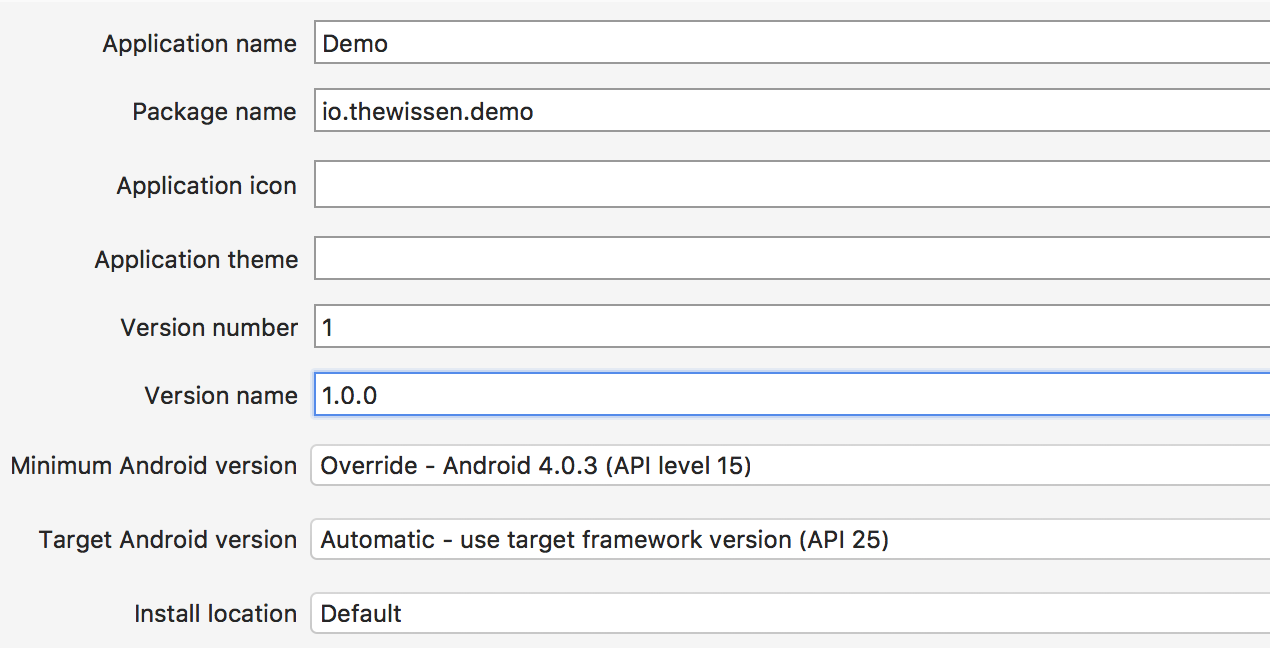
When we talk about a Xamarin Android app or any Android app for that matter the version number resides in the AndroidManifest.xml file so let’s open that up in Xamarin Studio and edit the Version name to 1.0.0. Since you’ve followed along with the iOS part of things you’ll probably already see where this is going.
We start by editing the build definition we created in one of our previous posts by navigating to it and clicking the Edit button.

Once again we add the required Version Assemblies task that we recently installed by clicking the Add Task button.
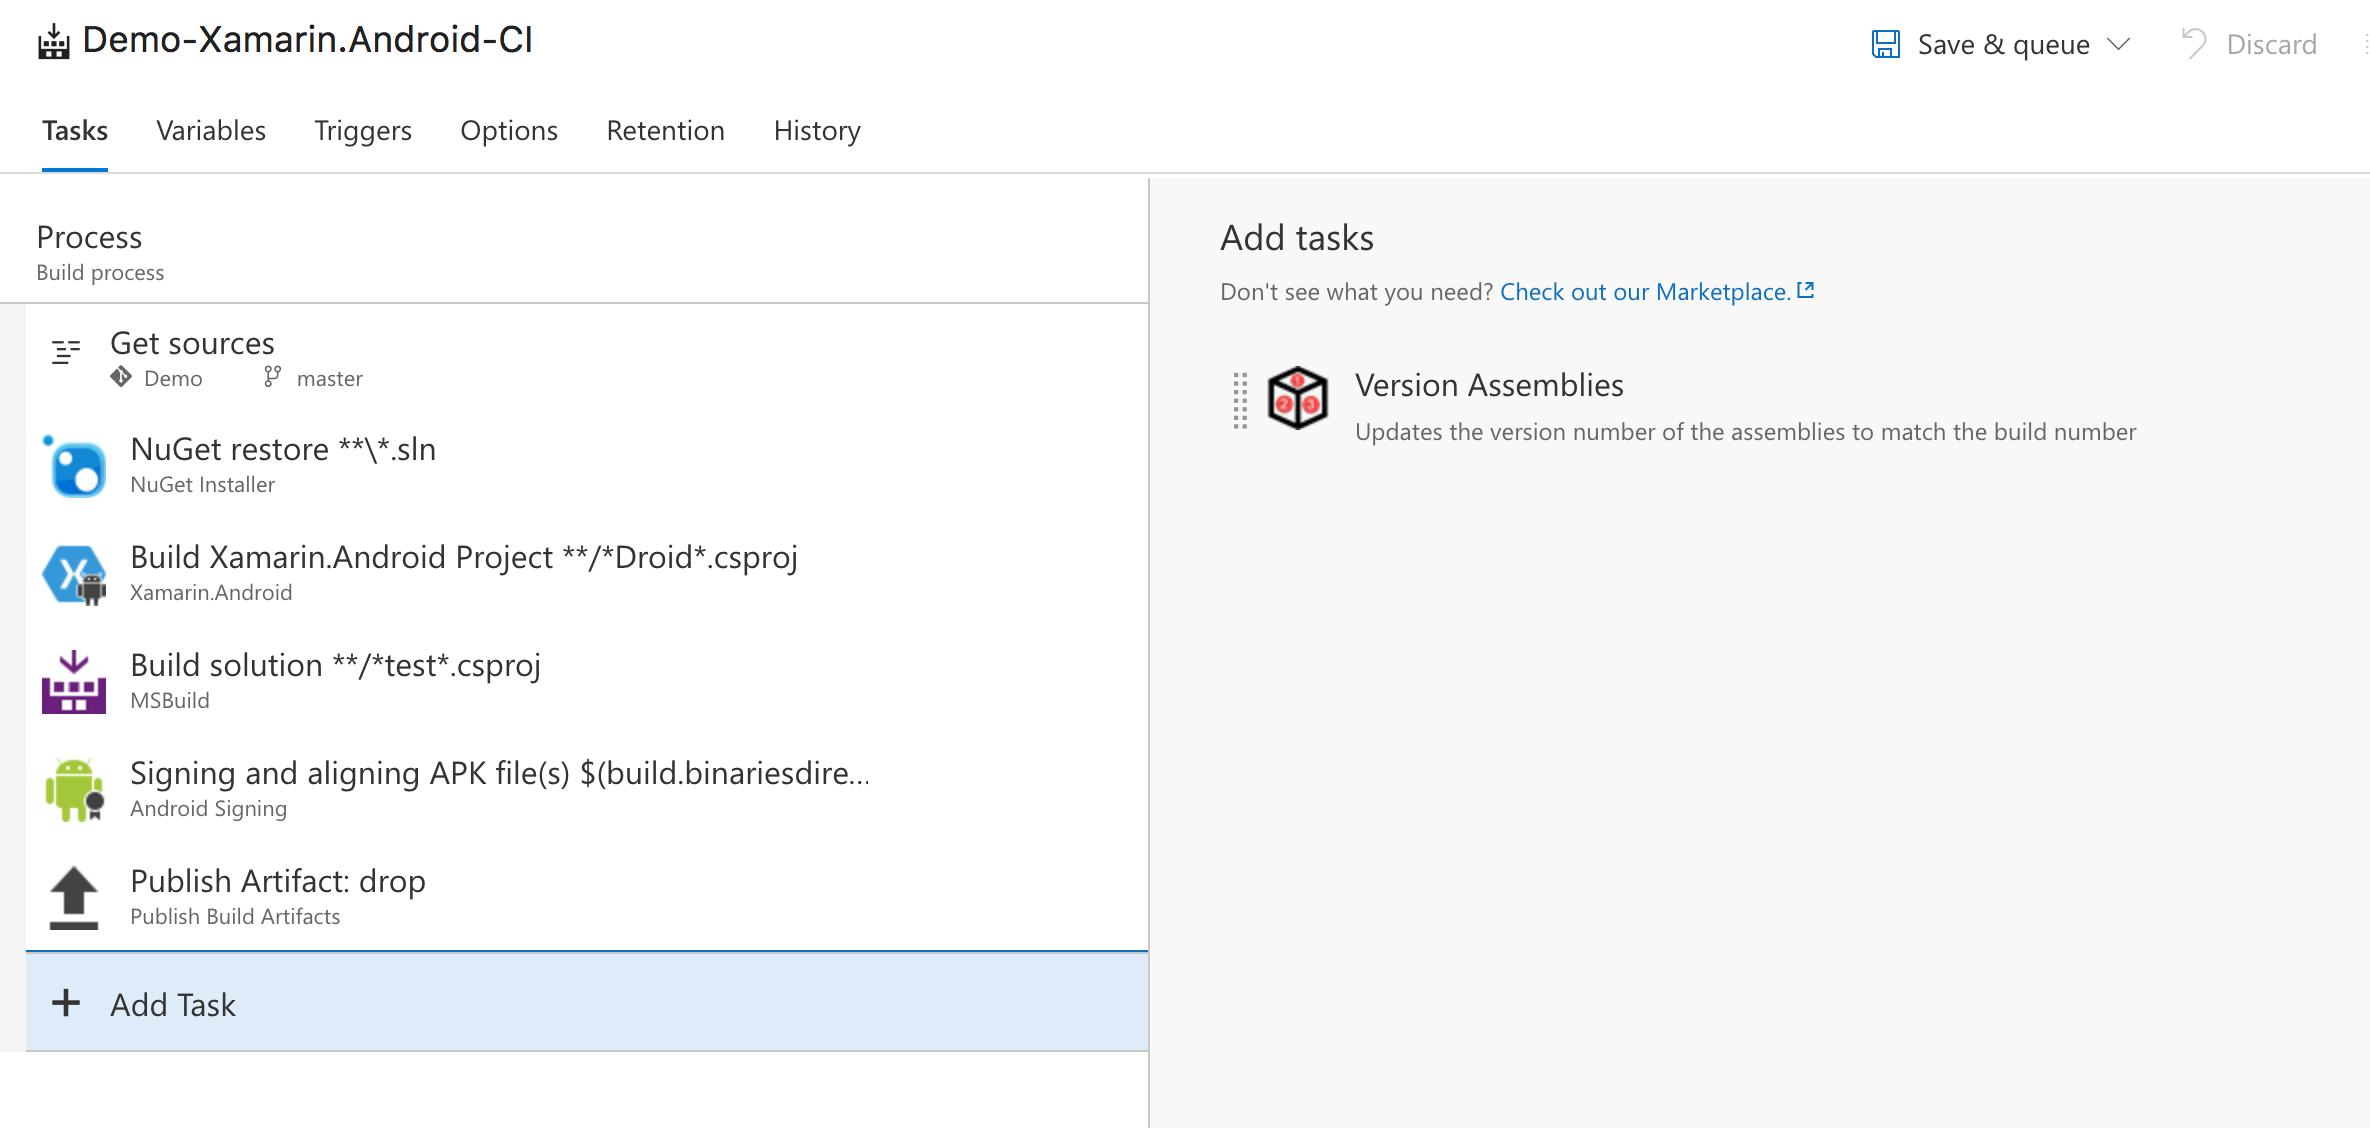
Because Android uses a different versioning mechanism we need to set it up slightly differently. Don’t forget to drag it between the NuGet restore step and the Build Android solution step. Also set the Source Path to our Android > Properties folder using the button with the ellipsis icon. Then we set the File Pattern to AndroidManifest.xml and our Version Source to Build Number. We saw that the Version Extract Pattern needs to match our format so we will have to set that to 1.0.0 to match our Android manifest. Obviously you should not forget to save your build definition!
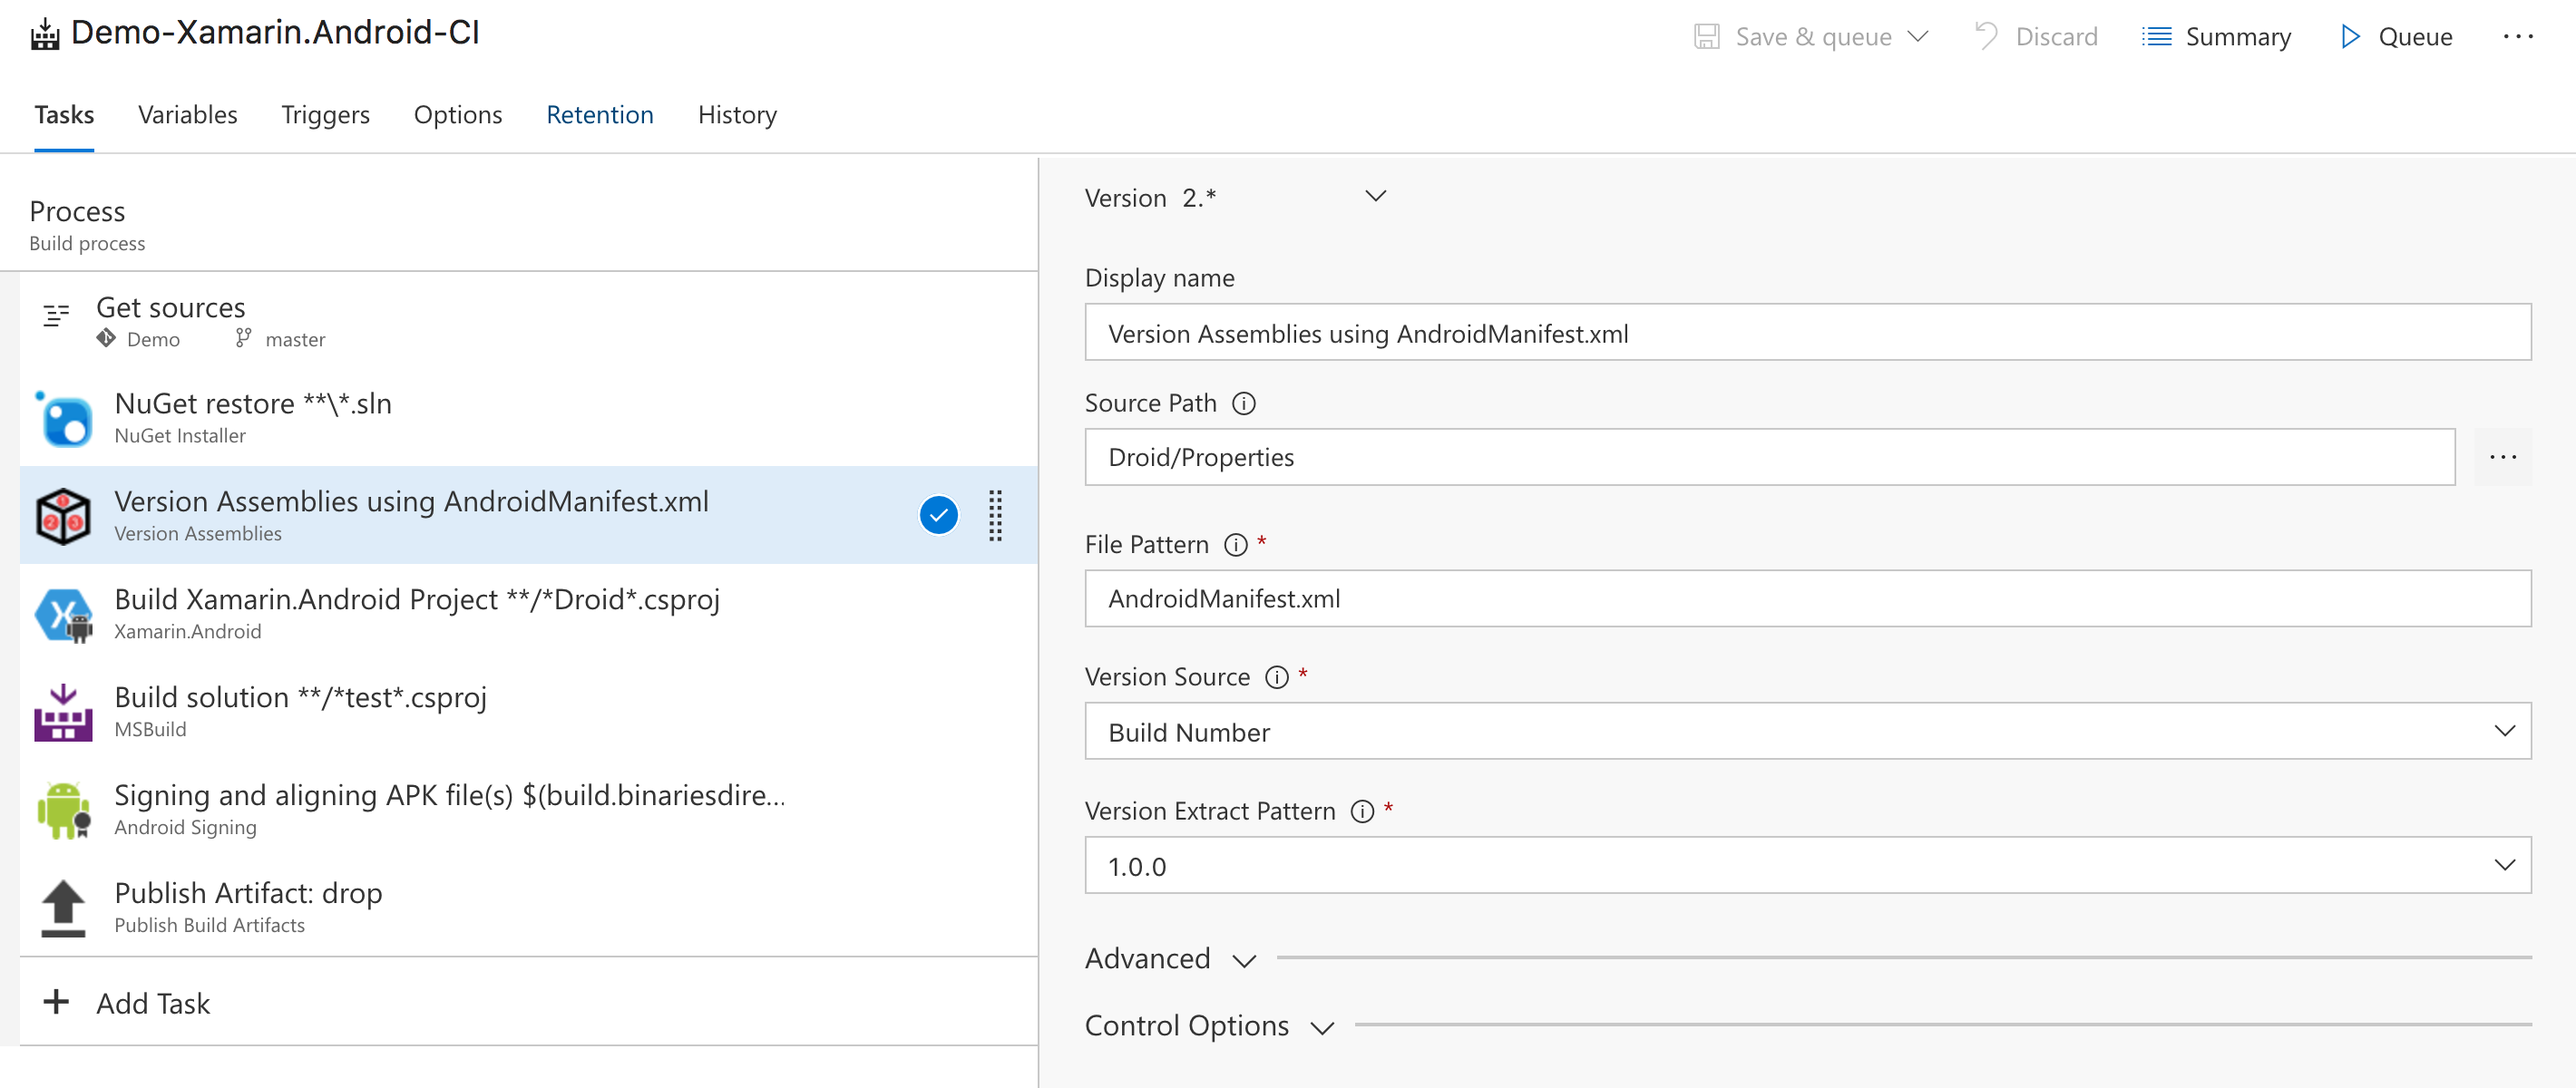
When that is all set up all we’re left with is the same stuff we did for iOS already. Then we add a MajorVersion and MinorVersion variable to the Android build and set these to 1 and 0. Decide if you want them settable at queue time and change the Build number format to $(MajorVersion).$(MinorVersion).$(BuildID) to finish the Android part of things.
Time to test this!
Queue one of your builds and check out the Version Assemblies step logging. It should look something like the logging below. Here you can clearly see that the version number was found in the appropriate file and replaced with the version number you provided. Which means we have achieved great success!

Conclusion
We added a version number to our apps in a standardized format. They will never be the same but they don’t have to be because they’re actually two separate builds so it makes sense that the build number differs! So far we’ve built our app for both platforms and ensured that the version number looks the same across both platforms. Finally, we can get that app out here in the wild by releasing it to HockeyApp which is something we’ll cover next time!

