This is the first post in a series on getting started with DevOps in a Xamarin project. One of the cornerstones of DevOps is automating a lot of tedious work such as builds, releases and testing. With this series I hope to clarify how I go about setting up my automation processes using tools like Visual Studio Team Services (VSTS), HockeyApp and Xamarin TestCloud. First up: setting up a build agent!
Why do I need it?
When using VSTS you can use the Hosted build agent which is basically a machine in the cloud that builds your application. It has a lot of software pre-installed on it but these are all Windows machines. When you want to build a Xamarin Android app that might work out but for an iOS app this will most certainly not work. You need an OSX based machine to perform your build. That is why we can turn one of our own machines into a build host and use it in VSTS. Another advantage to using a machine you have lying around is that it’s completely free to use in VSTS! Hosted agents are free to a certain extent but at some point you’re going to need more build minutes that VSTS offers you.
Creating a new Xamarin build agent
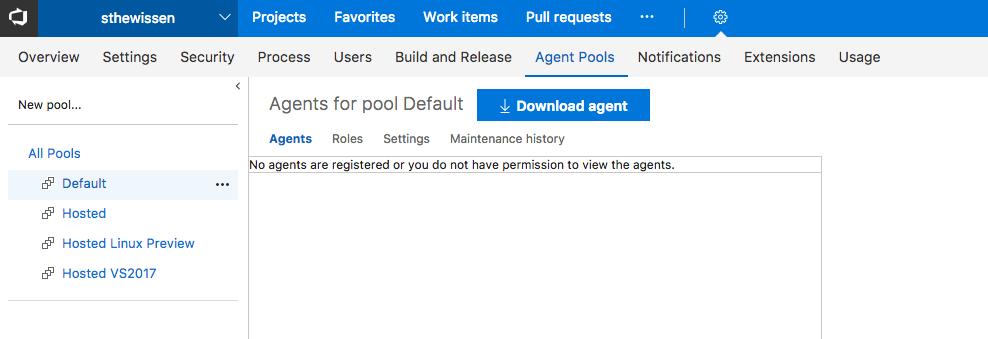
The creation of a build agent starts by sourcing yourself a machine. This can be a cheap Mac Mini (in my case) or some other kind of OSX machine. Connect it to the internet and the first step of creating a build agent is done! Make sure you install Xamarin because that is what we will be building. Next up pop open your VSTS and click on the gear icon to bring up the settings. Navigate to the Agent Pools tab and select the Default pool. There should not be a build host in here yet (unless you created one for a different purpose).

See that big shiny Download Agent button up there? That’s our next step! Pop open this window in your build agent and download the OSX agent using the shiny button. While downloading the agent you can setup a personal access token in the meantime. You’ll need this to ensure that your agent can connect to VSTS. Microsoft has a great tutorial on this.
Once you’ve download the agent bundle you can install it by starting a Terminal and running the following commands:
mkdir myagent && cd myagent
tar zxvf ~/Downloads/vsts-agent-osx.10.11-x64-2.115.0.tar.gz
This should unzip the archive in a directory called myagent which will reside in your current user’s root folder. Once installed, we need to configure it. To do so run the following command:
./config.sh
The configuration script should ask for 2 things. One of them is the URL of your server which is the URL of your VSTS installation. It should look something like https://{your-account}.visualstudio.com. Next up it will ask for your authentication type. Choose PAT, and then paste the personal access token you created earlier into the command prompt window.
Last but not least we need to run the agent. We can do this by running the following command in the Terminal.
./run.sh
You should see your agent spinning up and wait for jobs to come its way.

Conclusion
Your agent is now running and can accept build requests from VSTS. It will be able to build both Android and iOS applications as long as Xamarin is installed on the build host. How you create those build definitions in VSTS is something we will look at in the next post in this series. So stick around.

