When developing applications you inevitably encounter a piece of legacy code. In our case this code was put into DLL files that were being used by quite a lot projects. However, when you want to move towards automated builds using e.g. Visual Studio Team Services (which we will be using in this example) it will not have access to wherever you have these DLLs stored. The build is being made in the cloud after all. So how do you go about packaging your legacy DLLs into NuGet packages and hosting them in your own corporate feed?
Step 1: Gather those DLL files!
First step along the way is gathering up all the different DLL files that you want to package together. It doesn’t quite matter how many of them you put into one NuGet package but if you see a few of them being used together a lot then it would make sense to put them into the same package.
Step 2: Create a NuSpec file to define your package
When creating your package the info you see in the NuGet Package Manager comes from a so called NuSpec file. This is a simple XML file with a .nuspec extension. Below is a sample of how that looks. It has quite some recognisable fields such as a title, an author and a file icon. The file icon needs to be hosted somewhere on the web though and can’t be referenced from within the .nuspec file. The id is a unique name for the package and the version allows you to publish different versions of the package to your feed.
The most important elements are the references and files elements. The references element tells the NuGet Package Manager to create a project reference to the DLLs you link in its child elements. The files element lets you declare the set of files you want copied into your solution when the package is installed. For each file you need to specify the source (where the file should be found when creating the package) and the target (where the files should be copied when the package is installed). In this sample we installed some of Rebex’ components, which are currently not available as a NuGet package.
Step 3: Building a package using the command-line
Once you’ve completed your .nuspec file you can start building the package. This is done through the NuGet.exe command line tool. You can get this from Github. Using the pack command you can package everything into a nice .nupkg file. Running the following command from within the folder where your .nuspec file resides should give you your package.
"C:\Program Files (x86)\NuGet\NuGet.exe" pack Sample.nuspec -NoPackageAnalysis
Step 4: Publishing to Visual Studio Team Services
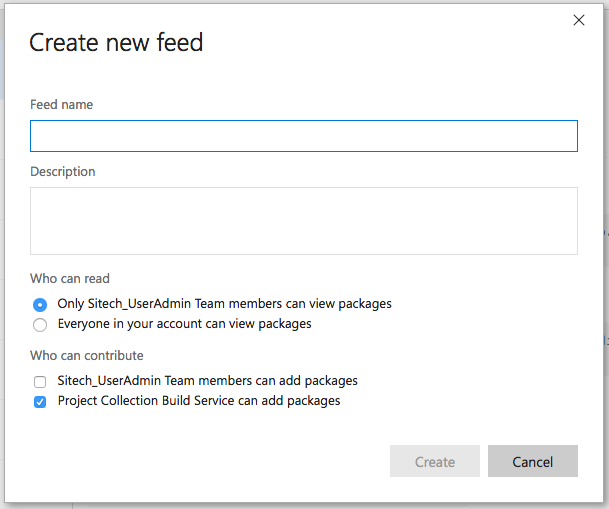
If you haven’t created a NuGet feed yet in your VSTS installation, go ahead and do so now. It’s as simple as going to the Package tab from within a Team Project and clicking New Feed. Fill in a name, a description and set some permissions, hit Create and presto! Your feed is created.

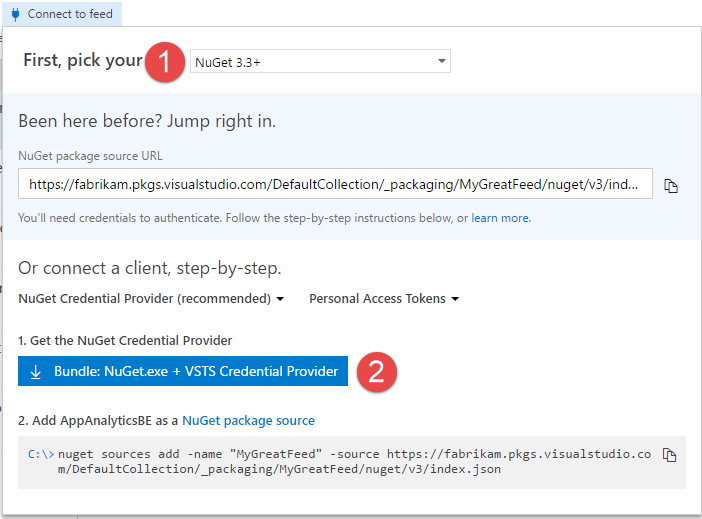
When that is done you can start connecting to it. Luckily there’s a button to do just that within this same tab! Hit the connect button and set the tool to NuGet 3.3+. A shiny button will appear where you can download a NuGet.exe packaged with some credential providers that will let you connect to your VSTS instance.

After downloading the necessary stuff, extract the files and run the following command using the NuGet.exe from the download:
nuget.exe push -Source {NuGet package source URL} -ApiKey VSTS {your_package}.nupkg
The package source URL is found in the dialog where you downloaded your NuGet.exe earlier in this step. The package name should match the name of the package you just generated. A dialog prompting for your credentials to connect to VSTS should appear. Fill in the necessary fields and when the process is done your package should appear in the feed on Visual Studio Team Services.
Step 5: Integrating your custom feed with the build
The final step is integrating this new package in your builds. Ensure that you’ve added the new NuGet package to your project and check in your changes. Since you’re hosting your newly created package on a NuGet feed of your own that the build process doesn’t know about we need to tell our build process that it should look elsewhere for it. This is done by adding a nuget.config file to the Team Project (by adding it into a solution folder for example). The nuget.config looks like this:
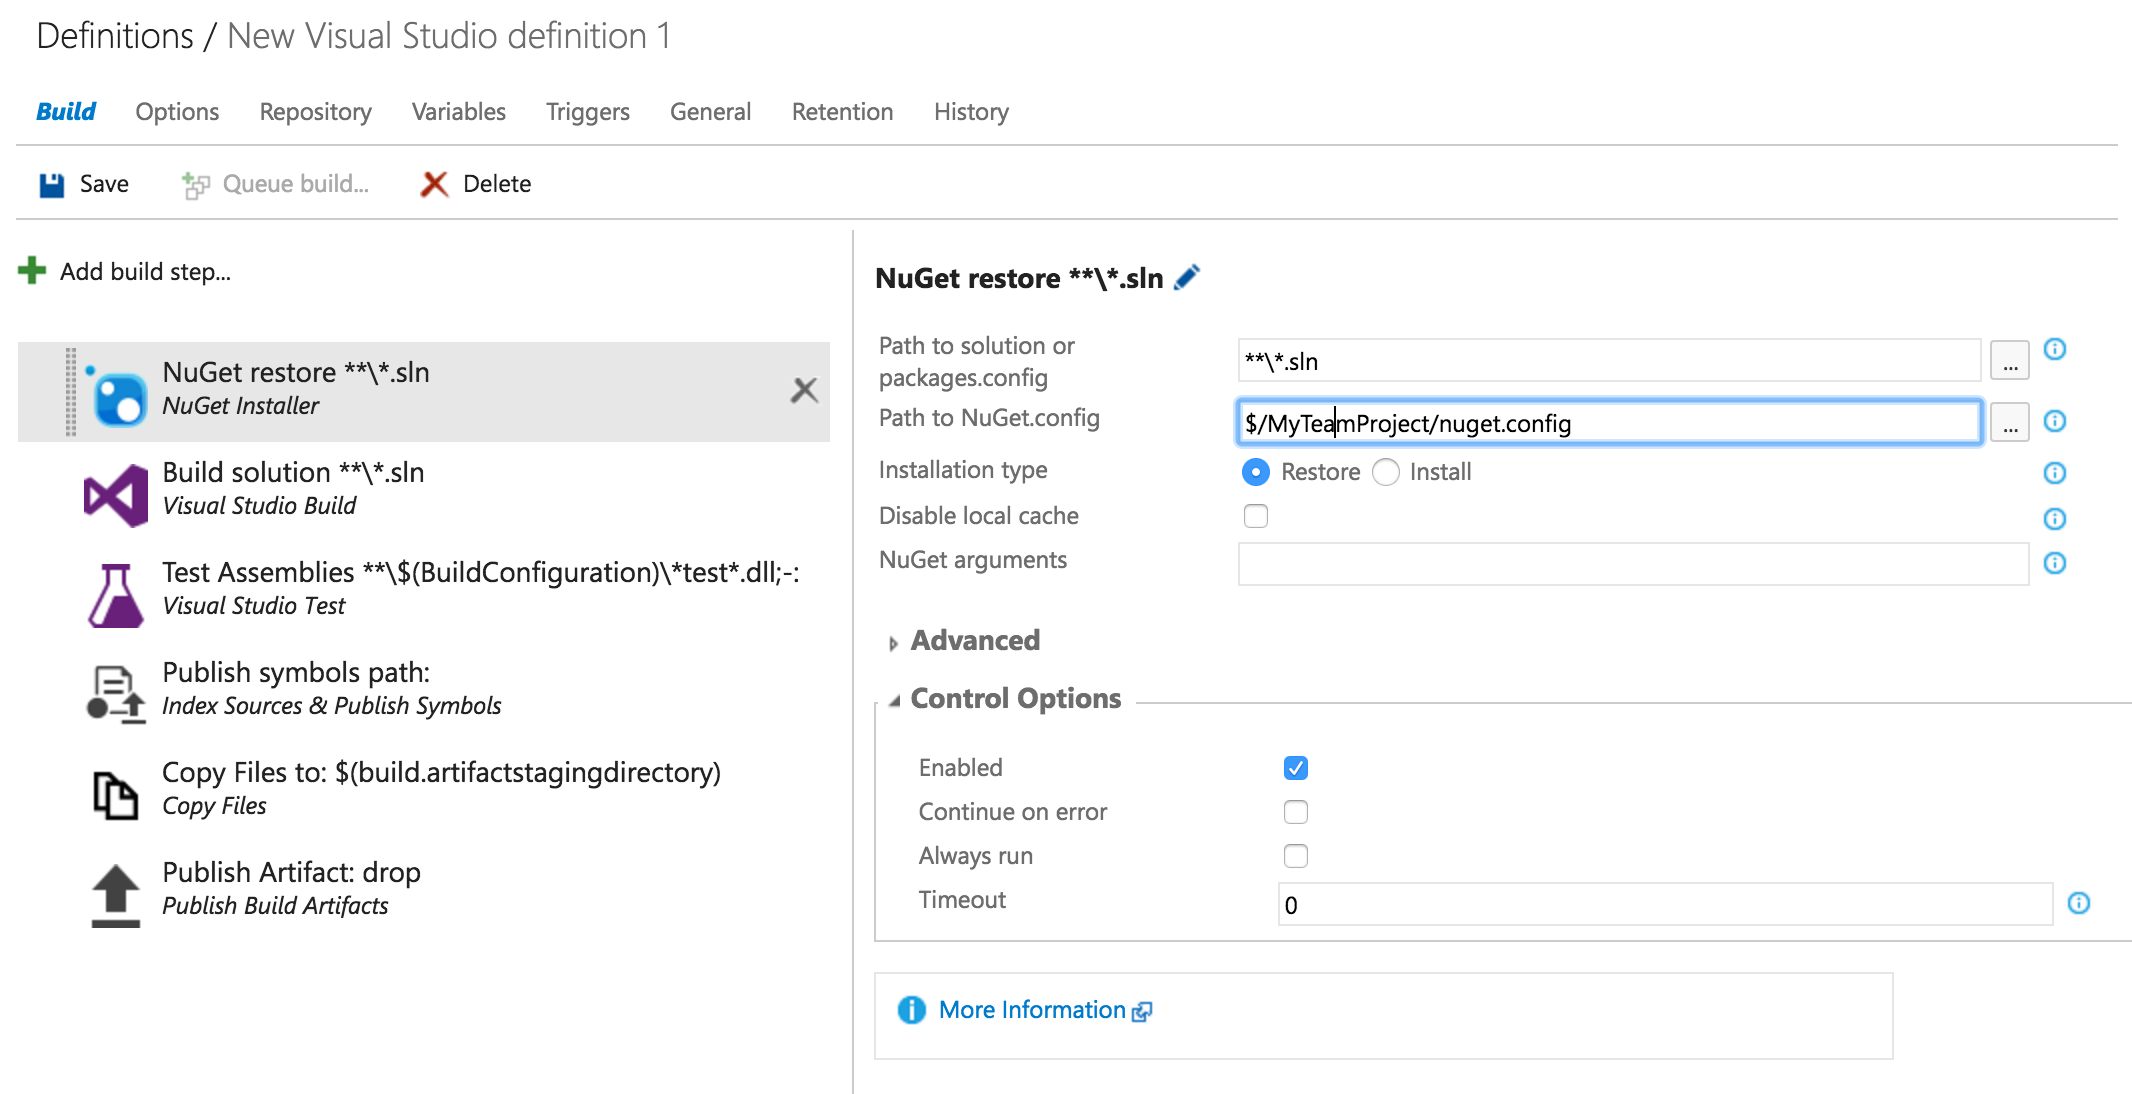
Once you’ve checked in the newly created config file you can edit your build definition. Add or edit your NuGet package restore step and point the Path to NuGet.config variable to the config file you’ve just checked in. Save your build definition and you should be good to go!


