Why would you want to be live-streaming?
When I started this year I set myself a goal to try new things and get out of my comfort zone of blogging. After all, writing blogs can be a fairly solitary task. I posted this tweet below when wrapping up 2019 and set myself some targets. Blogging more, try public speaking and get into live-streaming. Especially that last one seemed like a really fun way of interacting with people while doing what I usually do already: coding my little pet projects in the evenings.
 My 2019 in review
With COVID-19 hitting the world that social interaction became even more desirable, as social life has definitely taken a hit over the last few months. So why not give that streaming thing a try? Just one more small disclaimer before we dive into my experiences so far: I’m by no means an expert in this whole thing. At the time of this writing, I only did two of them. The first one of which I even forgot to save for later viewing ?♂️ (there’s your first learning right there).
Where to start?
This was definitely one of the first questions I asked myself. Where does one even start to get this show on the road? Luckily, I have a friend that has some experience with streaming on speed-dial. So, here’s the bare minimum you need!
The simplest of setups
- An adequate microphone. Even simple Apple earbuds can do the trick, but obviously sound quality won’t be stellar.
- Streaming software (most popular are OBS Studio or StreamLabsOBS).
- A Twitch / YouTube account (depending on where you want to stream).
- Something to talk about.
That’s really all you’ll need to get some basic stream going. With working from home being most people’s reality right now you probably already have an adequate microphone/headset that you’re using. The other parts of that setup are free, so there you go. A really cheap way to start live-streaming!
Upgrading your setup
All joking aside, you can obviously make it more complex by including some other things, but they’re definitely not required from the get-go:
- A camera.
- A dedicated streaming machine doing just the streaming.
- A capture card to capture video from a different machine.
- Fancy scenes and transitions in your streaming software.
- Fancy lighting.
- Background music.
- A StreamDecek type solution (making scene switching easier).
Diving a bit deeper
Let’s take a look at some of the things mentioned in the above setups in a bit more detail. Obviously a lot of this stuff comes in different qualities and grades and you can splurge as much money as you can muster on them.
Microphone
A good microphone is important, but most basic headsets will do just fine to get started. I’ve been using my Jabra headset that I also use for work meetings, but I do have a separate mic that I want to start using in the future. The advantage of a headset is that that’s all you need. When using a separate microphone you’ll pretty quickly also want a boom arm to hang it from and a pop filter to minimize some of the unwanted noises coming from your mouth.
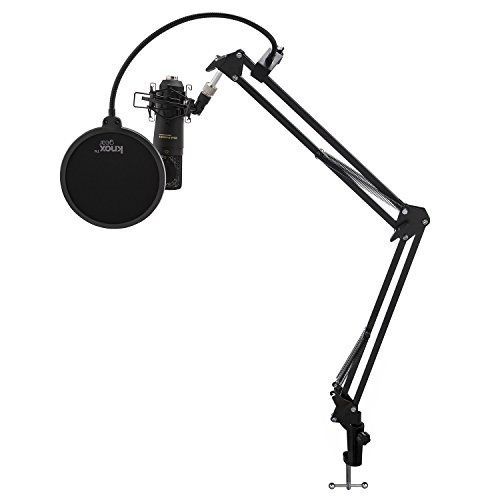 A boom arm + pop filter + microphone really ups your microphone game.
Camera
You could obviously use the camera that is right there on your laptop! That’s a really nice budget-aware way of doing it. However, webcam quality usually leaves something to be desired. If you already have a DSLR camera you could explore using that as your main camera. Canon has recently released a beta tool that lets you turn your camera into a webcam. However, you will need to make sure your hardware is supported because you might fry the chip on your DSLR. Not all of these are suited for video streaming hours on end.
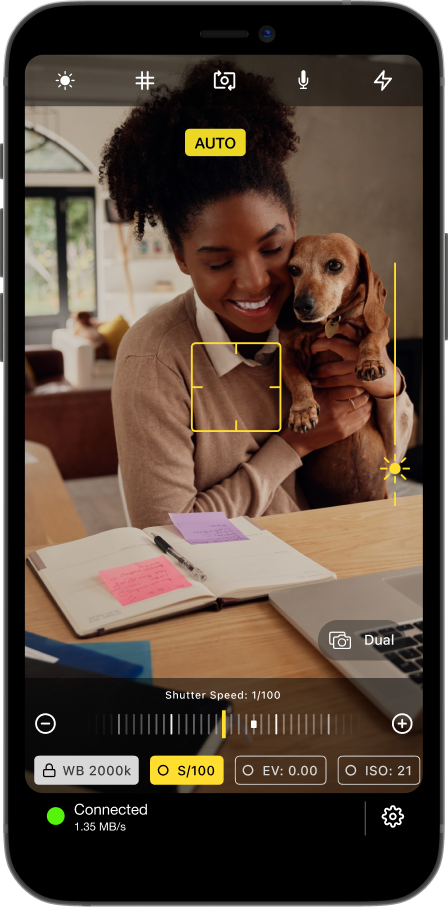 Using your old iPhone as a webcam using Camera for OBS Studio.
My current live-streaming camera setup involves a spare iPhone I had lying around. I believe it’s my previous one (iPhone 6S) which has a camera that dwarfs most laptop cameras anyway when it comes to quality. Using an app called Camera for OBS Studio you can turn your iPhone into a mean streaming camera. Do keep in mind, this solution will work differently when using StreamLabsOBS as your streaming software as it does not support custom plugins. You will need to look into NDI WiFi to connect it to your PC.
Capture card
If you’re not live-streaming from the same machine that you’re working on you can’t really get around getting yourself a capture card. There are a few options out there, but most people go for the Elgato line of products. When starting my buddy Gerald lent me his working Elgato and a broken one too to try and fix.
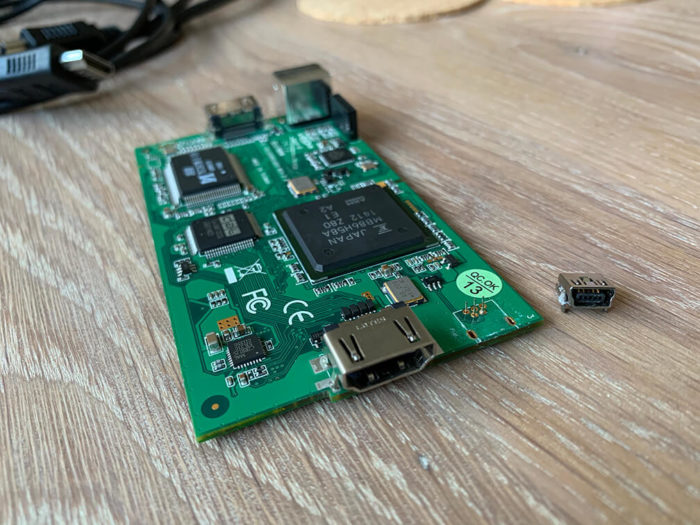 You get a broken Elgato and you get a broken Elgato!
Unfortunately, the broken one could not be revived even though I threw all my soldering experience at it. The one that did work, however, worked fine on my first few live streams. Because moving Gerald’s capture card back and forth like a child with separated parents wasn’t going to work I decided to buy my own one.
Dedicated streaming machine
This one is a touchy subject, to say the least. I had an old PC lying around doing nothing that I used for the first two streams I did. While I was using Gerald’s older model Elgato that was working fine. Unfortunately, newer Elgato capture cards require a USB 3.0 connection to function, which my PC doesn’t have. After Frankensteining all sorts of things together I decided I might be better off upgrading the old beast so I’m currently looking to get some new bits in there. If you have a machine that is moderately old (not as old as mine) that you could use as a dedicated machine when streaming you should be fine.
Fancy lighting
I can be quick about this: I don’t have any. Just make sure you’re in a well-lit room where people can actually see you. Surely, you can invest in key lights and all that good stuff, but your face will probably only be shown in a little bottom corner of the screen anyway. So make sure people see you and you should be fine when on a budget.
Background music
If you want to spruce up your awkward silences with some background music you can! I recently discovered Pretzel which is a library of stream-safe music that you can play in the background of your streams. Why stream-safe? Because if you want to upload your stream elsewhere to serve as an archive you might get a DCMA claim when you use licensed music. We don’t want that. You can use either the free version or the paid version, but the free version requires the attribution of each song. It does this by automatically posting the artist and title in your live stream chat. I personally don’t mind that as it also allows viewers to look up certain songs if they like them.
 Pretzel rocks. Literally.
Streaming software/scenes and stream elements
I can probably dedicate a whole separate post on this topic alone, so look out for that one in the near future. Basically, what this means is that you can create different scenes in the streaming software which have all sorts of customizable visual elements. E.g. a screen for when you’re screen sharing or one where you’re just chatting with people and not sharing a screen. There’s an enormous amount of options here and it definitely warrants its own blog post.
A Stream Deck to switch scenes
You have probably seen one of these fancy machines which allows you to switch scenes with the press of a button. They’re not only suitable for switching scenes though, as you can bind multiple actions under one button! You could, for example, bind a button to perform the following actions when pressing it:
- Start streaming.
- Select the “Starting soon” scene.
- Start a countdown stream timer indicating when you’re starting.
- Change your Twitter name to something different (e.g. Live Streaming Now ?).
- Send an automated tweet that you’re streaming.
As awesome as these things are, they are rather expensive (around $150).
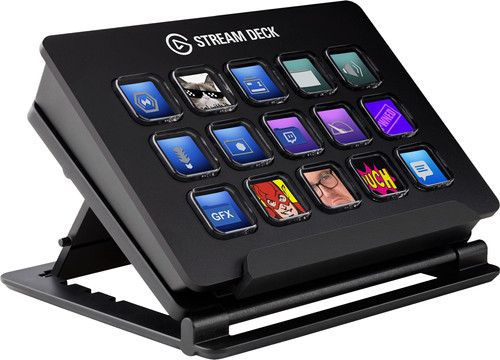 Elgato Stream Deck to up your scene switching + actions game.
However, there’s an alternative! Elgato also offers similar functionality in its mobile app, which you can get from your favorite app store. It’s free for the first month and costs $2,99 a month after that. Instead of dropping $150 on a physical deck, you can stream for 50 months for roughly the same amount. I have this one installed on my main phone, as I’m not using it anyway when streaming.
Summarizing my live-streaming setup
I’ll end this post by giving you a quick overview of what we’ve talked about and how much it has cost me so far. Mind you, you can get cheaper than this, it all depends on how far you want to take your new hobby!
- Microphone - FREE - already had a headset mic lying around.
- Elgato HD60S capture card - $179,99
- Elgato Stream Deck app - $2,99/month.
- Dedicated streaming machine - FREE - 10-year-old PC I had sitting there doing nothing. Will change some bits soon(ish). Going to spend some money on upgrades though.
- Camera for OBS Studio - $15.99 - Turn your iPhone into a webcam.
- Pretzel background music - FREE - If you can live with attribution in chat.
That’s my setup as it stands, but my buddy James Montemagno has also written up a list of live-streaming equipment that you should definitely check out if this is something you want to start exploring!
Conclusion
In this post, we set out to take a look at a simple live-streaming setup, and what I used to get my streaming experience started. You really don’t need a lot to get a simple stream going and can gradually expand on that initial setup. As you can probably tell from my setup, I also don’t have a lot of high-end gear and it runs just fine. Hopefully, you can get some inspiration from this and looking forward to seeing you in the streaming scene!

