In the previous articles in this series we set up our CI builds and versioned our app. Now we need to be talking about distribution. This is a vital part of any DevOps pipeline. In this blogpost we will be deploying our app to the HockeyApp platform which means it can be distributed to testers and stakeholders alike!
Other articles in this series
Make sure to check out some of the other articles in this series!
- The build agent
- Setting up your Android CI
- Setting up your iOS CI
- Versioning your app
- Deploying to HockeyApp (this post)
Releasing your app into the wild
In a continuous integration scenario you will most likely want to continuously release as well. Gathering feedback from your testers quickly is essential in an Agile environment. As soon as you merge code into your master branch you want to be able to get it to your testers. This is what we’ll be trying to achieve in this post using Microsoft’s HockeyApp tooling. The first thing we need to do is create an account over at HockeyApp. When you’ve done that you can start making an awesome release pipeline!
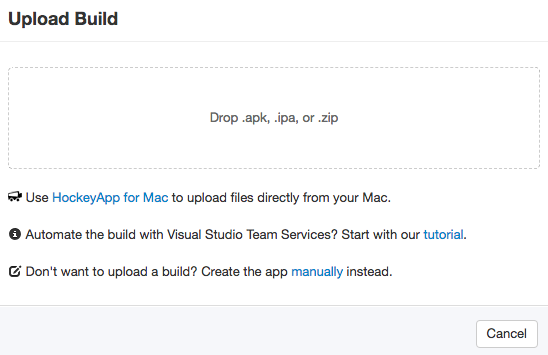
When you login to HockeyApp you will see a list of all the apps you’ve registered there. Let’s start off by creating a new app which we will be automatically releasing. To do so hit the New App button and either upload a binary of your app (which you can get from your VSTS builds that we defined in previous steps) or hit “Create the app manually” to fill in the required fields.
After successfully adding an app you will be presented with the App overview screen. From here you can add users that can test your app. I won’t go into much detail on this part because it’s pretty self-explanatory. What I do want to point your attention towards is the App Id which you will need to copy. We are going to need that later when we create our build in VSTS.

Configuring the release in VSTS
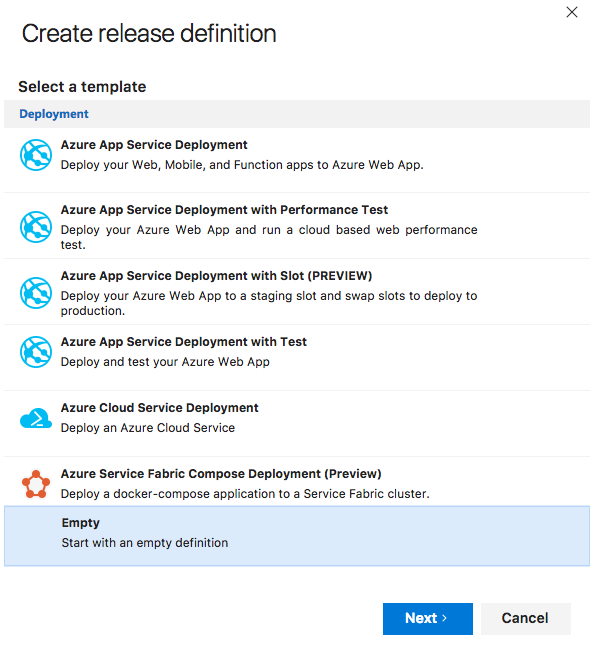
Next up we’re going to be moving over to VSTS. Navigate to your project and click the Releases tab. Create a new release definition and base it on the Empty definition template. There is no built-in HockeyApp template but since it’s pretty easy to create the definition we don’t need one either.
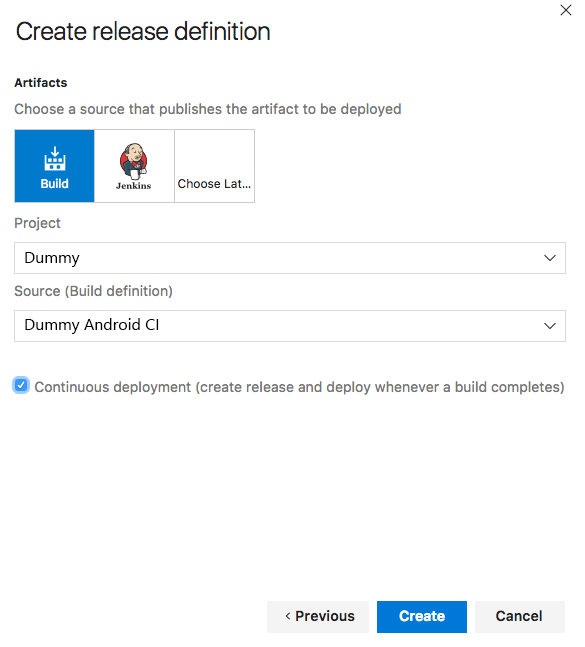
After selecting the template VSTS asks you to select a Project and a Source Build Definition. We created a build definition for Android and iOS in previous posts in this series and can re-use those here. Also make sure that you check the Continuous deployment checkbox. This is the magic ticket to total integration of your CI and CD pipelines.
Configuring HockeyApp in our release definition
When the definition is created you get an environment as well which you can rename to suit your needs which I renamed to My Android CI and HockeyApp. Click on the environment and you should be able to add tasks.
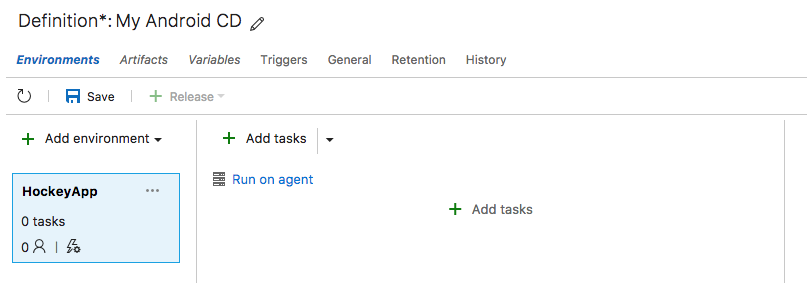
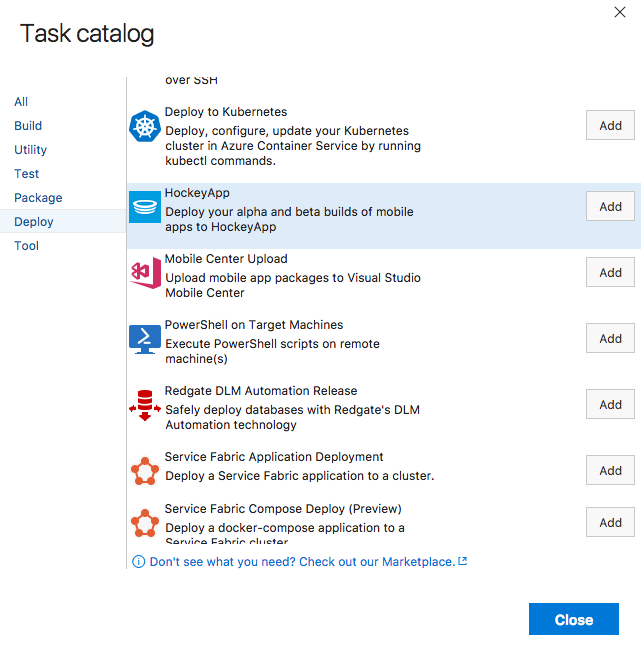
We’re going to add 1 task. Click on the Add Tasks button and search for the HockeyApp task which should be in the Deploy category. Hit Add and once it’s added click the Close button. Click on the task you just added to configure it.
When configuring there are a few field that you are required to fill. Let’s start with the App Id which should be the same App Id we copied over from HockeyApp in a previous step. To tell VSTS what files to send over to HockeyApp we also fill the Binary File Path field. For an Android build you can put **/*.apk in there which basically tells VSTS to look for any APK files coming out of your CI Build. For iOS you can set this to **/*.ipa. Also set the Symbols Path to **/*.dSYM for iOS if you want to publish these to HockeyApp.
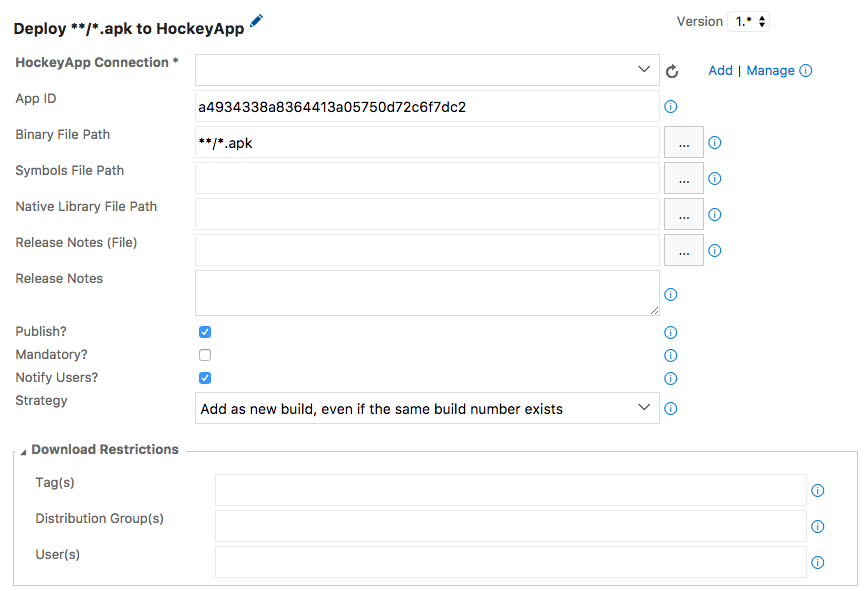
Additionally you can define if your users need to be notified of a new release and if it’s a mandatory release by checking the checkboxes. The Download Restrictions section enables you to target a specific audience. You can do this by defining Distribution Groups in HockeyApp. Set these values to only target a subset of users with a release.
Linking HockeyApp to VSTS
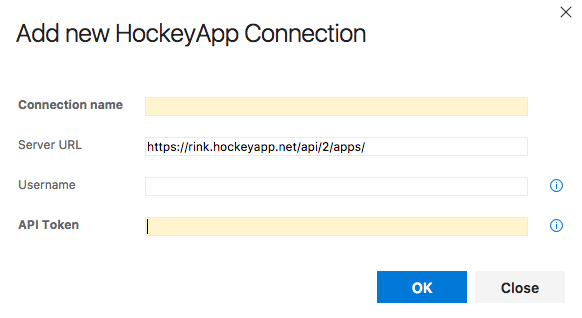
As you may have noticed I glanced over one field in the HockeyApp task definition. The HockeyApp connection field. You will need to connect your VSTS instance to your HockeyApp account so these two systems can exchange information. Hit the Add button behind the field and a popup will appear asking you to provide a Name, Server URL and API Token. The Server URL comes pre-filled and Name can basically be anything you want it to be.
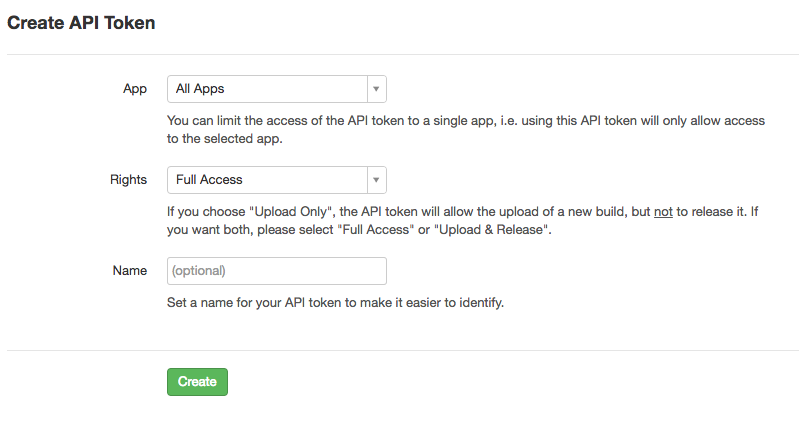
To create an API Token you can visit the API Tokens page in HockeyApp. Here you can define a global token or one specific to your current app. After you’ve created your token you can copy it over to VSTS and save the connection. Don’t forget to Save the VSTS release definition itself and you should be good to go. Time to queue a new build and watch the release magic happen!
Conclusion
This post scratched the surface of creating a release definition to deploy your app to HockeyApp. You can add additional triggers on specific branches of your project and there are a lot more tasks available to add to your definition if you also need to release additional infrastructure such as databases when the app is released. There is much more to discover but this should at the very least give you a working Continuous Deployment pipeline for your Xamarin app!

